はじめに
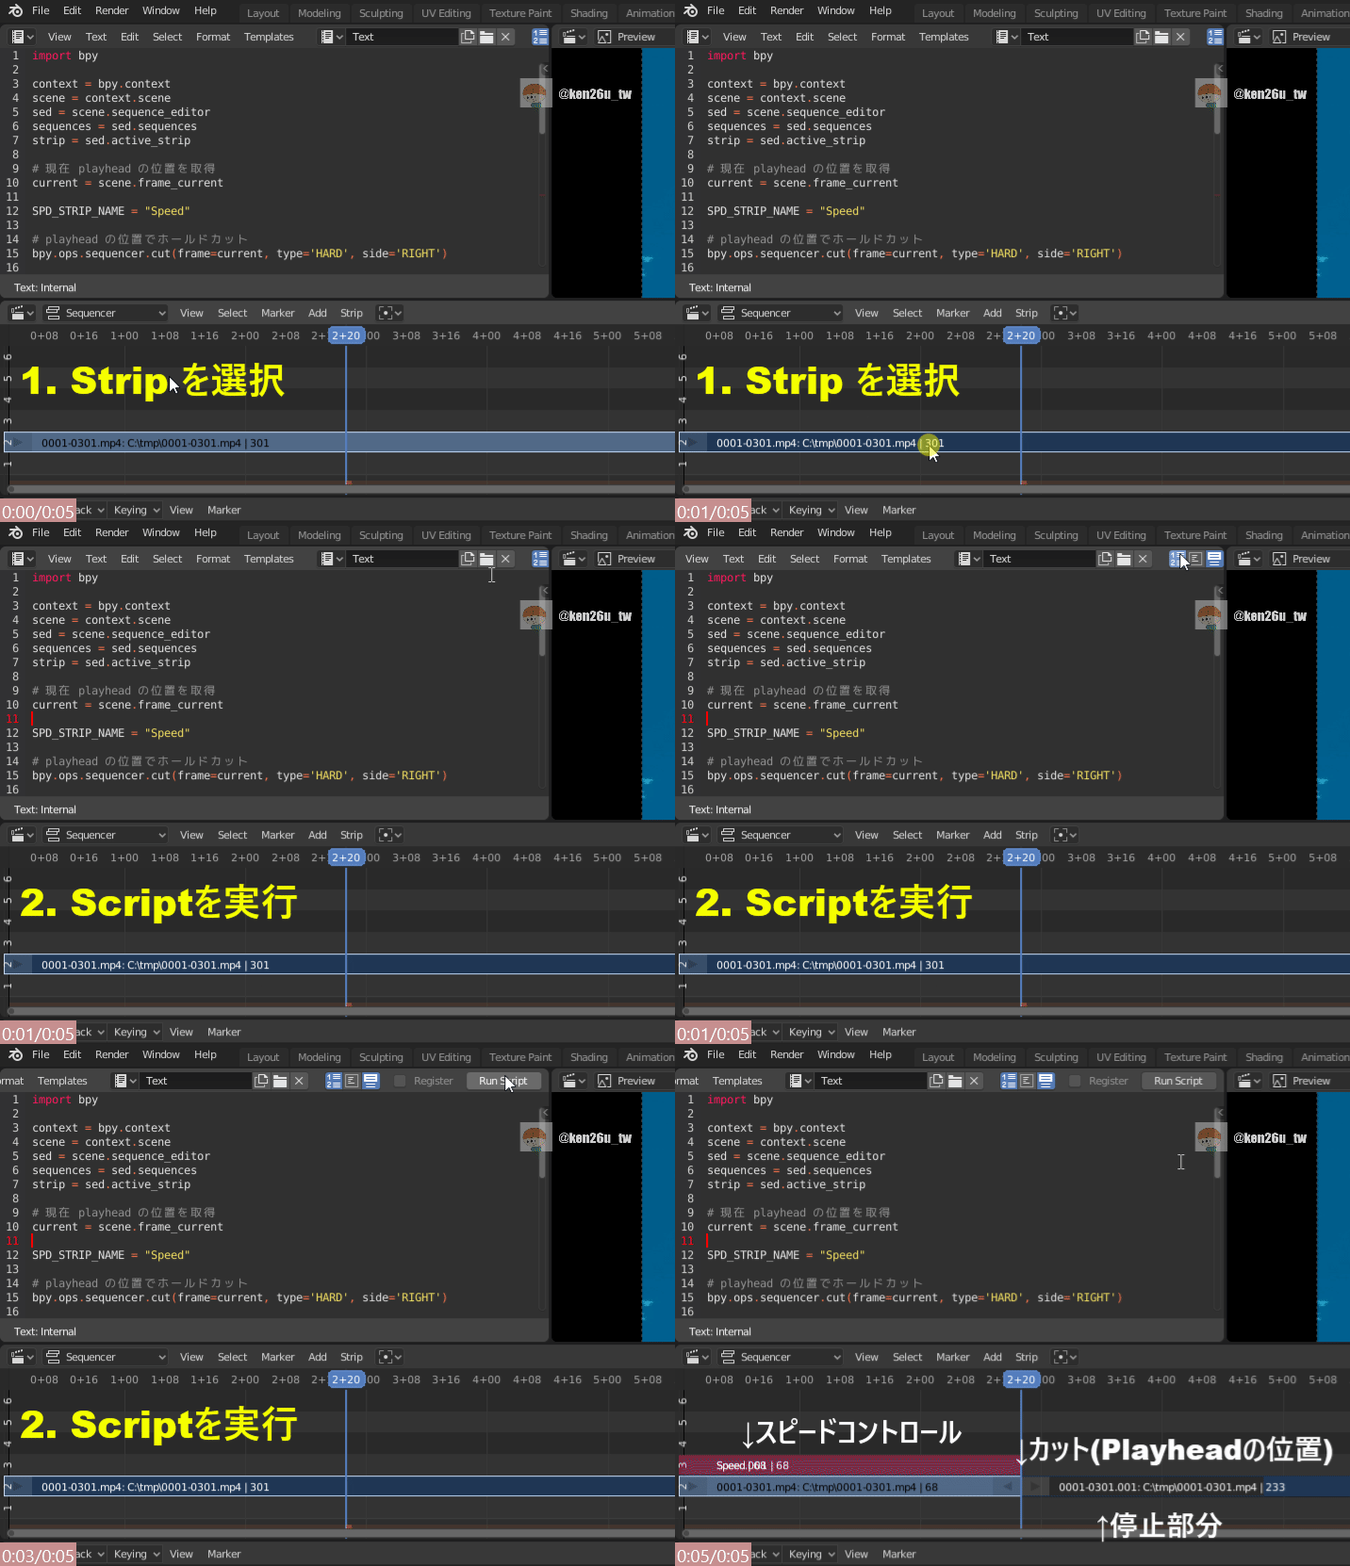
選択したストリップを Playhead の位置でカットして、カットした後ろのストリップは48フレームの停止期間を入れ。カットした前の部分にスピードストリップを入れる。
Youtube動画を作っていると一つの動画の中だけでも軽く10個以上はある上記の操作を少しマシにすべく、スクリプト化。

※これは作業イメージ
コード
import bpy
context = bpy.context
scene = context.scene
sed = scene.sequence_editor
sequences = sed.sequences
strip = sed.active_strip
# 現在 playhead の位置を取得
current = scene.frame_current
# Speed strip の名前
SPD_STRIP_NAME = "Speed"
# playhead の位置でホールドカット
bpy.ops.sequencer.cut(frame=current, type='HARD', side='RIGHT')
# context エラーが出ないようにする為のコード
for area in bpy.context.screen.areas:
if area.type == 'SEQUENCE_EDITOR':
context = bpy.context.copy()
context['area'] = area
for rgn in area.regions:
if rgn.type == 'WINDOW':
context['region'] = rgn
break
# 切った後の右側の Strip を48フレーム右へ移動
bpy.ops.transform.seq_slide(context, value=(24, 0))
# 選択中の strip を取得
strip = bpy.context.selected_sequences[0]
# 選択中の strip を48フレーム前に伸ばし、切った部分の停止画像を48フレーム分作る
strip.frame_final_start = strip.frame_final_start -24
# アクティブな strip を取得
strip = sed.active_strip
# Speedストリップ追加
sequences.new_effect(SPD_STRIP_NAME,
"SPEED",
strip.channel + 1,
strip.frame_start,
frame_end=strip.frame_final_end,
seq1=strip)Code language: PHP (php)

